最近公司微信公众号想使用 Apple 式的圆角阴影卡片做文章推荐。这种效果用 Adobe XD 可以轻松做出来,但是没法要求所有编辑都去学习新软件,所以就打算用前端实现一个小工具。效果如下:
更新:已增加 Electron,可打包成 dmg 或 exe 文件运行。详见 GitHub。
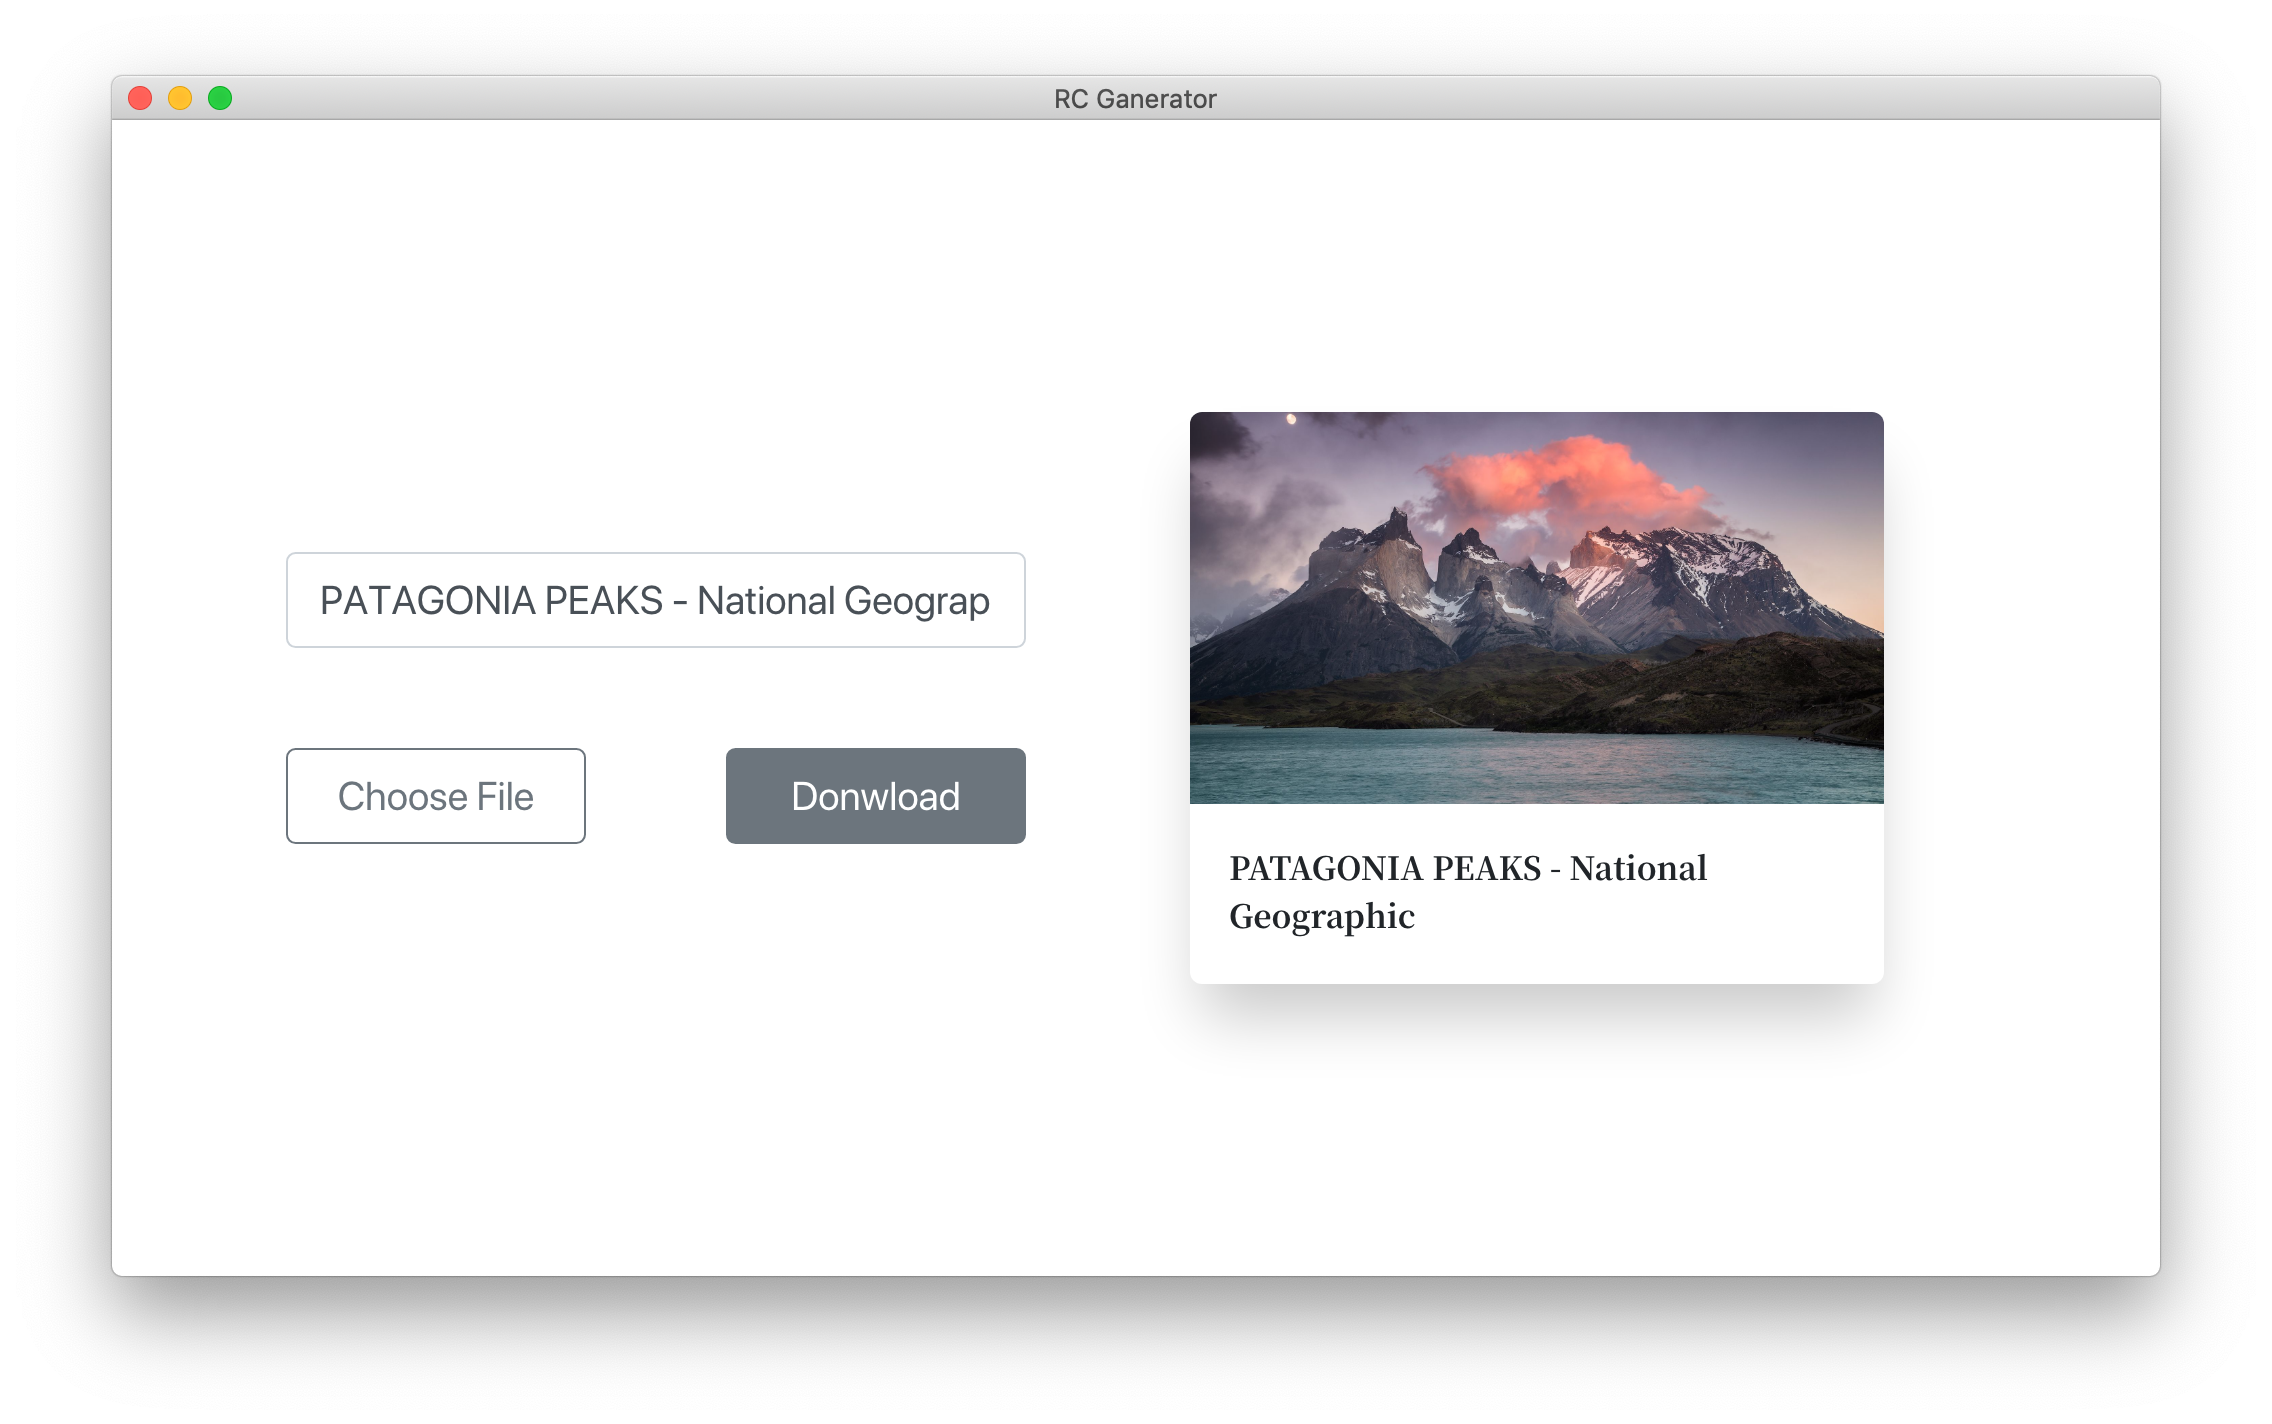
功能很简单,选择一张图片,输入标题文字,下载即可得到一张 PNG 格式透明背景的圆角阴影卡片图。核心的步骤有这几个:
其中关键一步 HTML 转图片,利用了著名的 html2canvas 库,其他几步都可以用 Canvas 轻松完成。
剪裁图片
为了简化功能,对选取的图片统一按 16:9 居中剪裁。
获取图片文件
从 input 获得 File 对象后,把它转成 Canvas 对象。
1
2
3
4
5
6
7
8
9
10
11
12
13
14
15
16
| function listenFileInput() {
const fileInput = document.querySelector(`#${INPUT_FILE_ID}`);
fileInput.addEventListener('change', ev => {
const file = ev.target.files[0];
const image = new Image();
image.onload = loadImage;
image.src = window.URL.createObjectURL(file);
});
}
function loadImage() {
const src = cropImage(this);
document.querySelector(`#${CARD_IMAGE_ID}`).src = src;
}
|
剪裁
利用 .drawImage() 将原图以剪裁模式「绘制」到新的 canvas 上,最后返回 base64 的图片地址,可直接用于 <img> 标签的 src 属性(见上一段代码末尾)。
1
2
3
4
5
6
7
8
9
10
11
12
13
14
15
| function cropImage(image) {
const width = image.width;
const height = Math.round(width * TARGET_RATIO);
const cropX = 0;
const cropY = Math.round((image.height - height) / 2);
const canvas = document.createElement('canvas');
canvas.width = width;
canvas.height = height;
const ctx = canvas.getContext('2d');
ctx.drawImage(image, cropX, cropY, width, height, 0, 0, width, height);
return canvas.toDataURL();
}
|
HTML to Canvas
直接利用 html2canvas 库。这个库目前在 GitHub 上有 13K+ star,最新的版本是 1.0.0-alpha.12,使用非常方便。
1
2
3
4
5
6
7
8
9
10
11
| async function generateScreenshot() {
const htmlDom = document.querySelector(`#${HTML_ID}`);
const scale = getScale();
const origCanvas = await html2canvas(htmlDom, { scale });
const roundCanvas = drawRound(origCanvas, scale);
return drawShadow(roundCanvas);
}
|
圆角阴影
生成圆角矩形图片需要用到 Canvas 的 .clip() 方法,其作用是在 canvas 上只显示 clipping 区域内的内容。思路是先在 canvas 上画出一个圆角矩形,然后将上一步生成的图片「贴」进去。
由于经过 clip 的 canvas 只显示 clipping 区域内的内容,所以不能在这个 canvas 上直接给图片增加阴影,而是要将该 canvas 绘制到一个更大的 canvas 上,然后给这个圆角矩形的 canvas 增加阴影。
圆角矩形
1
2
3
4
5
6
7
8
9
10
11
12
13
14
15
16
17
18
19
20
21
22
23
24
25
26
27
28
29
30
31
32
33
34
35
36
37
38
39
40
41
42
| function drawRound(origCanvas, scale) {
const roundCanvas = document.createElement('canvas');
roundCanvas.width = DOM_WIDTH * scale;
roundCanvas.height = DOM_HEIGHT * scale;
const roundCtx = roundCanvas.getContext('2d');
const roundRadius = RADIUS * scale;
const x1 = roundRadius;
const y1 = 0;
const x2 = x1 + roundCanvas.width - 2 * roundRadius;
const y2 = y1;
const x3 = x2 + roundRadius;
const y3 = roundRadius;
const x4 = x3;
const y4 = y3 + roundCanvas.height - 2 * roundRadius;
const x5 = x2;
const y5 = y4 + roundRadius;
const x6 = x1;
const y6 = y5;
const x7 = x6 - roundRadius;
const y7 = y4;
const x8 = x7;
const y8 = y3;
roundCtx.beginPath();
roundCtx.moveTo(x1, y1);
roundCtx.lineTo(x2, y2);
roundCtx.quadraticCurveTo(x3, y2, x3, y3);
roundCtx.lineTo(x4, y4);
roundCtx.quadraticCurveTo(x4, y5, x5, y5);
roundCtx.lineTo(x6, y6);
roundCtx.quadraticCurveTo(x7, y6, x7, y7);
roundCtx.lineTo(x8, y8);
roundCtx.quadraticCurveTo(x8, y1, x1, y1);
roundCtx.clip();
roundCtx.drawImage(origCanvas, 0, 0);
return roundCanvas;
}
|
阴影
根据阴影尺寸决定背景 canvas 的尺寸。最终下载的图片的尺寸,就是背景 canvas 的尺寸。设置太小,阴影会显示不完整;设置太大,则边缘留白空间太大,浪费空间且影响使用。
1
2
3
4
5
6
7
8
9
10
11
12
13
14
| function drawShadow(origCanvas) {
const bgdCanvas = document.createElement('canvas');
bgdCanvas.width = origCanvas.width + MARGIN_WIDTH;
bgdCanvas.height = origCanvas.height + MARGIN_HEIGHT;
const ctx = bgdCanvas.getContext('2d');
ctx.shadowOffsetX = SHADOW_X;
ctx.shadowOffsetY = SHADOW_Y;
ctx.shadowBlur = SHADOW_BLUR;
ctx.shadowColor = SHADOW_COLOR;
ctx.drawImage(origCanvas, MARGIN_WIDTH / 2, 0);
return bgdCanvas;
}
|
下载
将做好的带有阴影的 canvas,通过 .toDataURL() 得到 base64 地址,设为 <a href="" download /> 的 href 属性,即可下载使用。
小工具的完整代码位于 GitHub:reading-card-generator。